Printing
a) download the model file here
b) save the model file (it’s in your downloads folder) to your project folder in your personal drive location
c) Locate the slicing program Cura on your computer. It is within a folder called ‘Ultimaker Cura’. Open the program.
d) Select the printer you intend to use. We have three printer options in the room:
- Printrbot Play (non-heated bed)
- Monoprice Select Mini V2
- Tinkerine Ditto Pro (to use this printer another slicing program must be used)
d) Within Cura, open the model file from your saved location
e) Rotate the model so as to best position it to print. Consider how a 3D printer builds the print.
d) Make any setting adjustments necessary. If using a Printrbot Play you will need to adjust the printing temperature as the default is too low. Set this to 215 degrees.
f) ‘Prepare’ (slice) your model file. Take note of the estimated print time.
g) Save the prepared file to an SD card (you will need a ‘USB card reader’ )
h) If using the Monoprice mini the card can now be inserted into the printer. If using a Printrbot Play the file that you intend to print will need to have it’s name changed to ‘auto0.g’ prior to the card being inserted into the printer.
3) Printers are both expensive and delicate. Please ask for assistance if unsure how to use any of the printers. Mistakes can often lead to costly and time consuming repairs 🙁
Soldering the Components
Soldering Tips/Considerations
- Safety – eye protection, smoke eaters, do not touch hot things (put soldering iron back in the holder immediately after use)
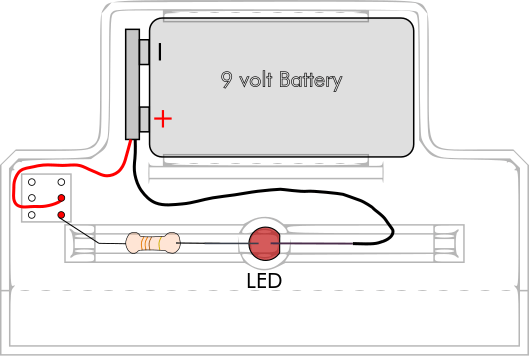
- Identify the cathode (negative) lead of your LED and solder to the negative lead of the battery clip (reversing an LEDs polarity will stop current flow and your LED won’t light)
- Soldering the push button switch terminals will be challenging. Take care not to ‘bridge’ the terminals, this will prevent the circuit from being able to be switched off)
- Never solder on a powered circuit (the battery must be removed when soldering components)

Wiring Diagram